I'm in l.o.v.e. with this crafting machine. It can do so much and has given me the tool I need to start and finish (and finish is key) so many projects around my house. Let me show you just what I've been up to...
This is a sign that I used to have hanging in my house but after Jim and I got married he suggested I throw it out. I tucked it away in my craft room until I figured out just what to do with it. My first step was to spray paint this board completely black.
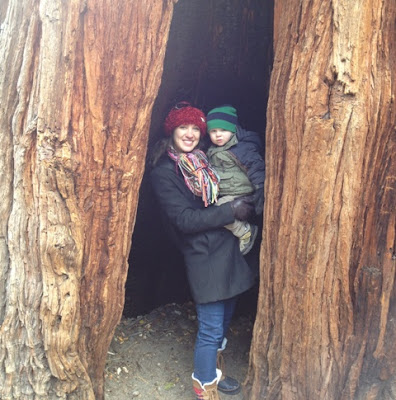
I got the idea on the wording for this new sign after spending Christmas with my sweet sister in law. I love this picture of her with my nephew on our hike in Tahoe.
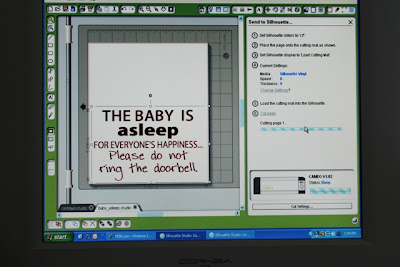
She (and everyone else with babies) could really use a sign like this. A quick search on pinterest (my new obsession) gave me the perfect phrase to print. Using the silhouette software, I designed the sign and then sent the sticky vinyl through the machine for cutting.
Talk about immediate gratification - fun!
The next step is to use transfer paper so I can move my stencil to the board that I'm painting.
Once I applied the transfer paper with my vinyl to the board, I smooth it down with a Popsicle stick.
Remove the transfer and there is your stencil.
I was aces until I got to this point. I figured I could get away with using paint leftover from other craft projects.
Wrong. So very very wrong.
It was soooo bad, I didn't take a picture. I spray painted the entire board again and started over.
My second attempt was on a thin and flat canvas. I thought the smoother texture (as opposed to the bumpy wood board) would help with the paint bleed. I also made a trip to my craft store for newer paint, in a medium designed for this type of craft.
It was definitely better, but I still had some bleed on the canvas and I really wanted my letters crisper.
I started again.
This is my old "So many men..." sign. I love the way it turned out. I put a pretty print down first, then I used my Silhouette Cameo to cut the words out of thick cardstock and layered the paper on top. I gave this several coats of sealant, which wrinkled the paper a bit, but I'm still happy with how it turned out.
This was done with patterned paper down first, then instead of using the vinyl as a stencil where I paint the letters, I peeled away everything BUT the letters and then spray painted the entire thing. Peeling the letters away let the paisley design show through nicely.
Pretty yellow patterned paper with brown spray paint on top.
Floral paper down first, and brown spray paint on top.
The background for this sign turned out to be too busy for the thin letters, so I will eventually repurpose this sign for something else. I like the saying though, "We do not answer the door for strangers." I have so many sign ideas from Pinterest. One of my favorites is "Unless you sell Thin Mints, No Soliciting."
This was a special order sign that I made for someone. It has the craft paper on wood, and then I used white spray paint and the vinyl as a stencil for the lettering. I especially like the shabby chic edges that I scuffed with sand paper. The wording is cute too...to the point, but still polite enough.
Same wording, but different design that was ordered by someone. It's not perfect, but she was very happy with the end product. I'm still perfecting these techniques, and hope to make more signs. I'm currently mulling over a sign for my gate to warn folks of my dogs...something about Attack Poodles??
After some online research I found a couple craft sites that advise to give your stencil a once over with your backdrop paint first. (This would work if I was not using craft paper as my background) I will definitely experiment more.
I have also been working on a pantry labeling system and I finally finished last weekend. These make me so happy.
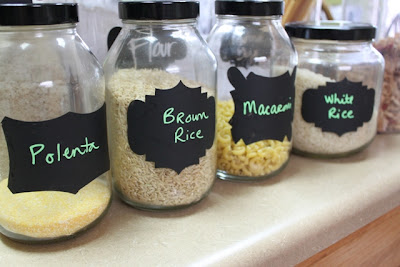
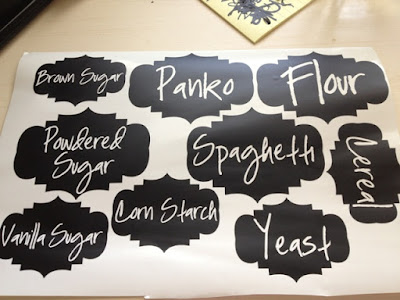
I have two styles of labeling going on here. Remember when I upcycled these glass jars? Using my silhouette I made the stencil for these painted labels and used chalkboard paint. This worked brilliantly! The bright green "bistro" chalkboard pen was purchased from my local craft store. I like being able to change the labels on these jars whenever I change the contents.
For my large OXO canisters I first created the custom labels in the Silhouette software. I stuck with one uniform label design (as opposed to the chalkboard labels that I created in several different designs). These have a fun Moroccan look to them, don't they?
Next, I weed away the letters and the extra outside pieces.
Then cut them up to get ready to transfer to each canister.
Apply transfer tape.
Peel the backing from the vinyl and position on the canister (I just eye ball the placement.)
After!!! What a difference.
Love.
Love.
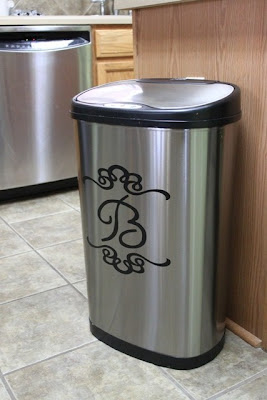
Have you seen this on Pinterest yet? Yes, I monogrammed my trash can!
Here is a simple tip I found online years ago that I just love. I keep the trash bags in the bottom of my trashcan - this surprisingly makes life easier when I replace the bags! Just a handy dandy tidbit I wanted to pass along.
See this boring corner of my kitchen?
I designed a pretty floral vinyl wrap for my ceramic utensil canister. Jim would have probably freaked out if I put the letter B on everything in the house - so I have to mix it up a bit! This was a single floral image that I duplicated three times and placed in different positions until I got the design to look random. I measured the height of my canister and then made a cut at top and bottom to get a straight line that fits perfectly.
My new tool for smoothing transfer tape is the plastic scraper that comes with Pampered Chef stone baking pieces. It's made for cleaning your stoneware, but also perfect for smoothing vinyl!
Peeling the transfer paper is one of my favorite steps.
Next, I stick the vinyl and transfer paper on my ceramic canister.
Love!
Love!
Love!
My kitchen is black, white and lime green, so this ties in just perfectly.
Oh yes, I labeled our laundry room door. I saw this on Pinterest and it just cracked me up.
I may have also embellished my husband's file cabinet.
And my craft room door. (but that's it, I'm not labeling any more doors)
Here is my craft room - now you know why the sign on my door is so appropriate. It's organized chaos!
I have supplies for painting, sewing, candle making, a gift wrapping station, decor items and lots and lots of odds and ends!
Speaking of sewing, this is the pillow I made for Jim's office chair. He had been collecting those iconic purple Crown Royal bags for years and I cut them up and sewed them together to make a pillow for him for Christmas. He loved it!
I have so many-many-many craft projects "on deck" and I hope to do another post with a round up of more completed crafty stuff.




.jpg)







Oh my word, I'm in love with everything you made! I'm not crafty, but really, really, really want to be. Was that all made with the Silhouette Cameo? I have so many things I want to make...I should have you make them for me and I'll pay you (money or pasta/olive oil/pesto, etc.!). Totally not kidding.
ReplyDeleteOf course I will make stuff for you. Shoot me an e-mail with what you have in mind and I can tell you what I’ve charged for custom signs and maybe we can barter with some authentic Italian products!
DeleteI love everything you've created!! The jar in the kitchen corner is my favorite and I love the trashcan & trashcan tip!
ReplyDeleteI need to buy some vinyl so I can come over and "borrow" your craft room and cameo!
Jenn I think it would be fun to host a craft party!
DeleteOh my, you ot only cook, you are an artist!! Here is a sign I would buy from you: "Unattended children will receive a free puppy and an espresso: I can't post it in the bookstore (not wise to anger the customers) but it will make my staff laugh when they take a break from all those rowdy children running through the store! Deb
ReplyDeleteHa! Ha! I love that sign. I will make you one, Deb!
DeleteWow, you're on a roll. Definitely loving the babies are asleep sign, have a friend that is expecting in April and that sign just gave me an idea. She's into monkey's and banana's, so thinking of a sign now saying, "WANT TO HELP MOMMY NOT GO BANANA'S? THEN DON'T RING THE DOOR BELL BECAUSE MY LITTLE MONKEY'S ARE ASLEEP." MAYBE I CAN PAINT A COUPLE LITTLE MONKEY'S SLEEPING ON A CURVED UNPEELED BANANA LIKE A HAMMOCK. Anyways, thanks for sparking a bit of creativity in me. I'll have to hurry and finish up the baby quilt first though.
ReplyDeleteWhat a clever sign idea. I may have to use that language and make some more signs with little monkeys!
DeleteI live in Austin, and would totally love to purchase one of those "baby is sleeping" signs from you!
ReplyDeleteI love how you are into pinterest lately!
ashley
I'm going to make one for myself this weekend, let me know if you are still interested purchasing a sign and I will make two.
DeleteI love the sign for the door Creativity is Messy. What fonts did you use?
ReplyDelete