I felt like cooking something new and asked Jim to dream up whatever he wanted for dinner as long as it contained puff pastry. He requested Beef Wellingtons and I was delighted to start research on this classic dish.
Some say it was his favorite meal, and others claim it resembled the boots that he wore. Whatever the case may be, the
Duke of Wellington has a grand dish named after him, which became the entertaining extravaganza of the 1960s. Read more at
epicurious.com.
There is a lot of hoopla surrounding this entree...made popular again by Gordon Ramsay on Hell's Kitchen where it's astonashing how few of the chef's on his show can mess up a Wellington. It led me to believe this was a difficult dish, but the more I studied recipes, the more I realized how
DO-able this actually was. Gordon has a highly produced
video on YouTube if you want to see how he puts a Beef Wellington together.
I must have read a dozen recipes about Beef Wellington, but narrowed my inspiration down to two that I blended into my own. Emeril Lagasse's Pork
Tenderloin en Croute was chosen because I liked the Mushroom Duxelle which I have made before, see
HWM Pork Tenderloin en Croute post here. Tyler Florence's
Ultimate Beef Wellington recipe was chosen for it's use of prosciutto, thyme and cooking times.
Two small cuts of fillet mignon that I seasoned with salt and pepper, and set on the counter to bring to room temperature.
To make the Mushroom Duxelle, I first minced a large shallot and added it to my cuisinart blender.
I purchased a bag of white button mushrooms that were already cleaned, and added three cups to the cuisinart blender.
Pulse until mixture is finely minced - especially because we don't care for mushrooms texture.
In a large saute pan, melt the 3 T of butter over medium-high heat and I added 1 T of minced garlic, and cooked, stirring, for two minutes.
Okay Jim, I'm ready for a glass of wine!
I'm going to cook with it, yes... but I'd also like a glass to sip on. Thanks love!
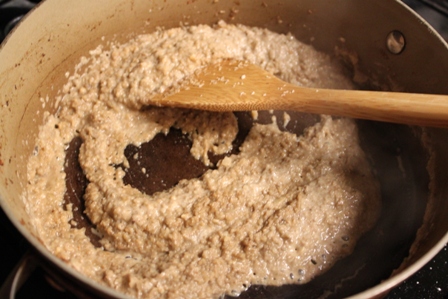
Add the mushroom mixture, 1 t salt and 1/2 t white pepper and cook, stirring, until the mushrooms begin to caramelize and all the liquid has evaporated.
The duxelle takes a full 20 minutes to reduce, so go ahead and pour yourself a glass of wine. Jim opened a Topel 2006 Cab, yum yum yum.
A lot of liquid has evaporated, now let's build some gorgeous flavor.
Add 3/4 cup of white wine. I used Murphy-Goode Chardonnay. Add 1 T soy sauce and 1 T balsamic vinegar.
Deglaze the pan with all these liquids and continue to stir and cook until the liquid is fully evaporated.
This is about five minutes later.
Remove the from heat and let rest while we assemble the other ingredients.
Heat your oven to a very hot 400 degrees. Put a little olive oil in a skillet and heat until just smoking. The meat should be at room temperature, and place those in the skillet and don't touch for two minutes. Then flip and let the meat brown on the other side for one minute, and then place the entire skillet in the oven for five minutes.
Defrost your puff pastry in the fridge, or out on the counter then roll it out to about 1/4 inch thick.
When the meat is finished in the oven, let it cool enough to handle and then cover in dijon mustard.
Here is the prosciutto I bought at my local grocery store.
Pull the thin pieces of prosciutto apart and lay in a single layer in the center of your puff pastry.
The next layer is the mushroom mixture.
In the very center, place the filet covered in mustard.
Now we are going to wrap this like a little present. Drape over the top layer of pastry very carefully, smoothing it down with your hands as you go. You don't want any air trapped between the pastry and the meat.
Spray a baking sheet with pam and place these pastry packages seam side down. Cut off any excess pastry (but be careful not to cut off too much) and pinch the openings closed with the tines of a fork. Mix an egg with a little water and brush the wash on top of each wellington.
The filet I purchased came wrapped in bacon, so I stretched it out onto the baking sheet to crisp up instead of wasting them.
I've been waiting for the perfect time to use this stuff: Bacon Salt!
I gave it a sprinkle across the top of the egg washed puff pastry. Any kind of specialty salt would be nice here...and no one will be disappointed if you leave them naked.
That's it. Just bake at 350 for 20 minutes and pull them out when the pastry is nice and brown.
I served the steaks with grilled asparagus and big salad.
Let these sit for about five minutes before cutting in.
These are so filling and very very flavorful. It's an impressive dish, and one that I found very easy to prepare. Beef Wellingtons are time-consuming to assemble, but can easily be completely prepped a day in advance and then slid into the oven for 20-30 minutes to bake before serving. I think it's perfect for birthdays, Valentine's Day, Mothers/Fathers Day, or Wednesday. Review the links posted above for Beef Wellington recipes and make this for you and your sweetheart soon.