As I usually do, I found two or three other recipes for potstickers that I also liked and blended all three of them into my own version. Here is my recipe:
 1 package of dumpling skins or wan ton wrappers
3/4 pound shrimp
3 stalks green onions, chopped
Pinch of canned bamboo shoots
1/2 pound ground pork
2 tablespoons soy sauce
1/2 teaspoon kosher salt
1/2 teaspoon sugar
2 tablespoons cornstarch
1 teaspoon freshly grated ginger
1 small bunch cilantro leaves (A handful)
1/8 teaspoon sesame oil
For the slurry:
1 tablespoon cornstarch mixed with 1/4 cup water in a small bowl
For Cooking:
Peanut oil
1/3 cup chicken stock
Dipping Sauce:
1 teaspoon Asian chili sauce
1/4 cup soy sauce
2 teaspoon sesame oil
1/2 teaspoon sugar
1/2 teaspoon rice wine vinegar
 My shrimp was frozen, so I defrosted them in warm water, then rinsed well in a colander. Pat very dry and then add to food processor. You could buy the uncooked shrimp and shell them and devein them yourself but just thinking about that makes me want to puke, so why not just buy the bag of already processed shrimp and have someone else do that disgusting part for you?
 Loosely chop your green onions and add with shrimp.
 These are bamboo shoots. I was very leery when the original recipe called for half a cup so I first tasted one from this can and I did not like the flavor that much.
  Instead of half a cup I only added a pinch. Turns out I don’t think they added a lot of flavor but provided a nice texture. Next time I would add maybe a fourth of a cup.
 Next tear off about ¼ your bunch of cilantro and throw into the food processor. Pulse 3-4 times until the shrimp is chopped but not pulverized, you want meaty bites. This is a good consistency for me.
 In a large bowl, add the ground meat
 Then combine the shrimp mixture with ground pork. Add soy sauce.
 Salt.
Salt. Cornstarch.
 Sesame Oil.
 Ginger. My tip here is to keep fresh ginger in a zip top bag in the freezer. It keeps for SO much longer and is also easier to grate when it is frozen. I learned that from the Food Network, couldn’t tell you what show or chef. But I love that tidbit.
 Mix well.
 To make the slurry, mix cornstarch and water in a small bowl. I just use my finger and stir really good each time because the cornstarch settles at the bottom quickly.
 Here are the wan ton wrappers I purchased.
 They are paper thin and dry out fast so you should work quickly. To get the proper potsticker shape, my wrapper needs to be round so I used my kitchen shears and lopped off the corners. No need to be a perfectionist here.
 Only work with 4-5 at a time since they dry out fast.
 Spoon 1 teaspoon of the filling onto dumpling skin.
 Brush a bit of the cornstarch slurry all around the edge of the dumpling skin.
Here is how you pleat a dumpling. Start by pinching in the middle, making sure to seal tightly. The cornstarch slurry worked REALLY well here.
 You’ll only be pleating the upper half of the dumpling. In this photo, all my pleats are made on the upper half.
 Start with your right side. Hold the dumpling in your hand and fold and pleat. You’ll do 3 pleats just like this on the right side. Then repeat on the other side, but in the opposite direction, so that all your pleats are pointing towards the center. This creates a crescent effect.
 Cover loosely with plastic wrap so that it doesn’t dry out. Although I don’t think this worked well for me.
 When you are ready to cook, heat a large nonstick pan with 1 and a half tablespoons of peanut oil over medium-high heat. Any cooking oil will do, I wanted the nutty flavor of peanut oil in this dish, and peanut oil has a high heat tolerance.
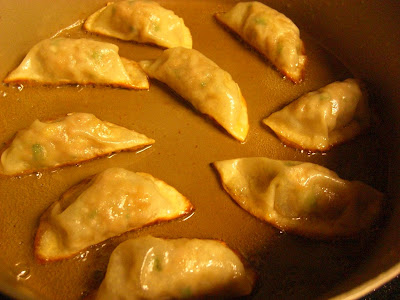
  When the oil is hot but not smoking, add the dumplings, flat side down, seam side up, not touching each other, to the pan. Let fry for 1 minute until the bottoms are light golden brown.
 Measure 1/3 cup chicken stock.
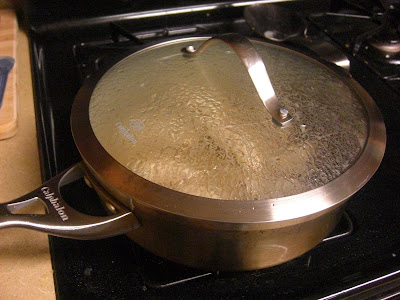
 Pour 1/4 cup of chicken stock into the pan and immediately cover with a tight fitting lid. Turn heat to medium and let the dumplings steam for 3 minutes. What none of my recipes told me was that chicken stock poured into a hot pan of oil will spit and splatter like crazy! I even burned my thumb a little when oil spat out on my hand. So this is what you need to do, have the lid in one hand and your chicken stock in the other and be very quick to dump stock and top with lid as you simultaneously jump back from the stove. I’m kind of kidding on that last part. But please be careful here.
 Open lid and let the remaining liquid cook off about 1 minute. Sorry, lighting is off in this photo. Cut into a dumpling to make sure that the filling is cooked through. Remove to plate lined with a paper towel to drain some of the oil off. Wipe the pan clean with paper towels and repeat with remaining dumplings.

 Serving with the dipping sauce is a must. A MUST I TELL YOU.
In a small bowl add 1 teaspoon Asian chili sauce, and in the future I will add more of this stuff, it is GOOD! Add 1/4 cup soy sauce, 2 teaspoon sesame oil, 1/2 teaspoon sugar, 1/2 teaspoon rice wine vinegar. Stir and enjoy. I’m not positive I would add the sesame oil again. I don’t like (personally) how the sesame oil sat on top of the other ingredients.


I wouldn't say that Asian cooking scares me, but I don't make it nearly enough to actually be comfortable with it. These look so good though - I want some right now!!!
ReplyDeleteThe step by step photos are really helping as I am intimidated by Asian cooking as well. Not sure why, as what I have tried has turned out fantastic, but I think it has something to do with the different ingredients. These look like they turned out great so it looks like you are on the road to recovery of this phobia!
ReplyDeleteI'm having a good time looking through all of your recent posts! They are making me so hungry! These look so good, and that sauce, yum!
ReplyDelete