Sunday, January 23, 2011

Making Whoopie

We are making Whoopie Pies! Not quite a sandwich cookie, not quite a cake, whoopie pies are known by two characteristics: their soft, rounded shape and a generous amount of sweet creamy filling.  For Christmas my mother in law bought me a whoopie pie pan and a wonderful cookbook, "Whoopie Pies" by Sarah Billingsley and Amy Treadwell.

The cookbook is adorable, with pages full of useful tidbits and helpful tips for making your own whoopie pies. I'm going to share what I learned, including the fact that you don't need fancy equipment to make whoopie pies. Here are some items I found really useful:
  • My KitchenAid Mixer: I used this for the cake batter and to whip the filling. Of course you could also do the mixing by hand and work those bicep muscles!
  • Whoopie Pie baking Sheets: I liked using this because it ensured my whoopie pies were uniform in size. You could also use baking sheets, just be consistent with your scoop size.
  • If you are using baking sheets, line with parchment paper or a silpat sheet liner.
For my first batch of whoopie pies, I let Jim choose from the recipes in our cookbook. His choice was Red Velvet Whoopie.

For Red Velvet Whoopie Pies you will need the following:
2 1/2 C all purpose flour
1 C cocoa powder (you could use as little at 1/4 C depending on your preferences)
1 t baking powder
1/2 t baking soda
1/2 teaspoon salt
1/2 C unsalted butter (1 stick), at room temperature
1/2 C vegetable shortening
1/2 (packed) brown sugar
1 C granulated sugar
2 large eggs
2 t vanilla extract
1/2 ounce (one small bottle) red food coloring
1 C buttermilk

Sift together the flour, cocoa powder, baking powder, baking soda and salt onto a sheet of waxed paper. (I didn't sift these ingredients first, and nothing bad happened to me.)

In the work bowl of a stand mixer fitted with the paddle attachment (oh, how I love this kitchen gadget), beat together the butter, shortening, and both sugars on low speed until just combined.  Increase the speed to medium and beat until fluffy and smooth, about 5 minutes. Add the eggs one at a time, beating well after each addition.  Add the vanilla and red food coloring and beat just until blended.

Add half of the flour mixture and half of the buttermilk to the batter and beat on low until just incorporated.  Scrape down the sides of the bowl. Add the remaining flour mixture and 1/2 cup buttermilk and beat until completely combined.

Using a spoon, drop about 1 T of batter onto a prepared baking sheet (or your whoopie pie baking pan) spacing them at least 2 inches apart.  Bake one sheet at a time for about 10 minutes each, or until the cakes spring back when pressed gently.  Remove the baking sheet from the oven and let the cakes cool on the sheet for about 5 minutes before transferring them to a rack to cool completely.
To make Classic Buttercream frosting I used:
3 C confectioners' sugar
1/2 C unsalted butter, at room temperature
3 to 4 T heavy whipping cream
1 t vanilla extract
Pinch of salt.

In the work bowl of a stand mixer fitted with the paddle attachment, beat together the confectioners' sugar with the butter, starting on low and increasing to medium speed, until the mixture is crumbly, about 1 minute. Add the heavy cream, vanilla, and salt and beat on high speed until smooth, about 3 minutes.
To assemble the Whoopie Pies, spread filling onto the flat side of one cake using a knife or spoon.

Alternatively, you can use a pastry bag with a round tip to pipe the filling onto the cakes, which will give you a smoother, neater presentation.

I personally like the wonky handmade look. But that's me.

Did you know a Whoopie Pie by any other name would taste as sweet? They have also been called Scooter Pies, Chocolate Drops, Round Dogs, Cream Cakes, Gobs, Moon Pies, and Black Moons.
Top it with another cake, flat-side down. Repeat with the rest of the cakes and filling.

If your treat is flat or thinly filled, sorry.... that is not a proper whoopie pie.

The cake part of the whoopie pies can be baked in advance and frozen. Bake as instructed by the recipe, cool them completely, then transfer to a cookie sheet and flash freeze in freezer for one hour. They will then be frozen enough to store in a resealable freezer bag without sticking to one another. These can be stored in the freezer for a month.

Most fillings (buttercream, ganache, cream cheese) can be made ahead and stored in a covered container in the fridge for up to a week. The "classic" fillings (Marshmallow and Whipped Chocolate Ganache) do not store well and are best used the same day.

When you are ready to assemble the whoopie pies, remove the cakes from the freezer and defrost at room temperature for at least 2 hours before filling. Remove the creamy fillings from the fridge and bring to room temperature about one hour before using.

A Fun Fact: Five-hundred people attended the first annual Whoopie Pie Festival in Dover-Foxcroft, Maine. One of the judges at the event is now working to make whoopie pies the state's official dessert.


Another fun fact: Instead of a wedding cake, Jim and I decided to order Whoopie Pies from our favorite little bakery in downtown Napa. Sweetie Pies in Napa, California produces some of the best cookies and sweet treats we have ever had. It's a must stop for us whenever we are in Wine Country.
This could quite possibly be the worst picture of Jim and I at our wedding. It's not going to make it into the wedding album but I will post it here for everyone to poke fun at.
Once you go whoopie, you'll never go back.

Saturday, January 8, 2011

Spicy Asian Meatball Appetizer

I made two types of appetizer meatballs for our 2010 Christmas Party. The first, Cranberry Cabernet Meatballs, were a huge hit and 2 lbs completely disappeared quick. The second meatball appetizer I made were Spicy Asian Meatballs based on a sub recipe I found online.

The sauce I used for my appetizer was inspired by a recipe on Food Network for Asian Meatball Subs With Hoisin Mayonnaise. Picture above from FN.com. The ingredient list was lengthy but the bones of the recipe sounded just divine!


HWM Spicy Asian Meatball Appetizer
2 pounds fully cooked frozen meatballs

1 cup hoisin sauce
1/2 cup mayonnaise
4 tablespoons fresh lime juice (there is no harm in using the bottled stuff if that is what you have on hand)
4-8 teaspoons Asian chili-garlic sauce (you control the level of spice with this ingredient)
½ cup chopped scallions to garnish (optional)
In a medium-size saucepan over medium heat, add all the ingredients except meatballs; stir to combine. Let simmer for 5 minutes, stirring often.
 
I found a whisk to work best in incorporating all the ingredients. The sauce thickened up nicely and the flavors were bold and spot on!
Remove from heat and either add cooked meatballs and serve... or you could let it cool and place in the fridge overnight. I made the sauce the night before the party and refrigerated overnight.

The night of our Christmas party I baked the meatballs in the oven and warmed the sauce on the stove top. Then serve the cooked meatballs with the sauce and garnish with scallions. It's a beautiful presentation (sorry I didn't get any pictures.)

For the meatballs, you can either heat them in the microwave or oven and then stir into the sauce and serve. Likewise, if you are putting this into a crockpot, you could add the cooked and frozen meatballs into the sauce and turn the crockpot on high for an hour or so until the meatballs are thawed and hot.

These meatball appetizers were my favorite for flavor and ease of preparation! Be bold in the kitchen my friends!

More HWM posts on meatballs:

Thursday, January 6, 2011

Cranberry Cabernet Meatballs

Jim and I threw our annual Christmas party last month and I did all the food planning and cooking. It is an event I look forward to every year and I begin the planning process in November. One of the appetizers I decided on early were these Cranberry Cabernet Meatballs. I could just imagine how the flavors would come together and I knew I could get this made the night before and quickly put out with little preparation the next evening. It's a winner folks!

Here is what I used:
2 lbs fully cooked frozen meatballs
2 cans whole cranberry sauce (not the jelly)
2 cups firmly-packed brown sugar
4 teaspoons hot Chinese mustard

2 cups GOOD Cabernet Sauvignon (I can't emphasize the need to use good wine enough. I used a Murphy-Goode Cab from California)

This recipe could not be simpler. In a medium saucepan over medium heat, add cranberry sauce, brown sugar, Cabernet wine and Chinese mustard.

Stir and let the mixture simmer for five minutes. Remove from heat, let cool and then I placed mine in the fridge overnight until it was party time.

The night of our Christmas party I poured the sauce back into a saucepan and heated until warm. I thought the sauce was too thin, so I mixed about a tablespoon of cornstarch with some water and stirred into the sauce. Within a minute the sauce thickened up to my liking.

For the meatballs, you can either heat them in the microwave or oven and then stir into the sauce and serve. Likewise, if you are putting this into a crockpot, you could add the cooked and frozen meatballs into the sauce and turn the crockpot on high for an hour or so until the meatballs are thawed and hot.
 

I served the Cranberry Cabernet Meatballs in this chafing dish and I couldn't BELIEVE the reaction I received. I am not exaggerating, everyone went nuts over this appetizer and the meatballs went so quickly! Jim is still pissed that he only got two...he says when he went back for seconds they were all gone. I made 2 lbs of Cranberry Cabernet Meatballs!

I would say that the wine you select is very important for this dish. The meatballs themselves also need to be a brand you know and trust. If you want to make the meatballs yourself, even better. Here is my recipe for homemade meatballs. If using homemade, I would suggest you cook them fully before adding to the sauce so that they hold together and not fall apart. I've done this before and ended up with meat sauce instead of meatballs in tomato sauce. I wouldn't say it's a terrible thing, I just served it over noodles and called it something entirely different.

Next up is the other meatball recipe I used at the 2010 Christmas party. It was actually MY favorite, but for some reason most guests (or at least the first 20 people) gravitated towards the Cabernet Meatballs. Oh, and I couldn't end the post without pointing you to the first cocktail meatball recipe I ever tried. The ingredient list will surprise you but your guests will love you for serving them. Check out these Hard To Believe Meatballs, I will give you a hint...there is grape jelly in the sauce!

Monday, January 3, 2011

Croque Monsieur/Madame (Ham and Cheese Sandwich)

I was watching the movie "It's Complicated" the other day, and I laughed out loud at the scene where Alec Baldwin comes into his ex-wife's kitchen, played by Meryl Streep and devours her leftover Croque Monsieur. In the movie, her character says it was the first thing she learned how to cook when she lived in France because the ingredients were so cheap.

Croque Monsieur is basically a fancy ham and cheese sandwich. Croque Madame is a similar sandwich with an egg on top.

Basic Croque Madame from Epicurious
8 slices white or whole-wheat sourdough bread
8 ounces Gruyère cheese, sliced into 24-32 1/16-inch-thick slices
12 ounces smoked ham, such as Black Forest, sliced into 12-16 1/16-inch-thick slices
4 extra-large eggs
3 tablespoons unsalted butter
Fleur de sel or kosher salt, to taste
Freshly cracked black pepper, to taste

To assemble the sandwiches:
Set half of the slices of bread buttered side down, and cover them with the cheese slices, folding them back in toward the middle if they extend past the edges of the bread. Place 3 or 4 slices of the ham in an even layer over the cheese, and place the top slice of bread over the ham, buttered side up.

Grill the sandwiches in a two-sided grill or on a heavy-bottomed pan, using clarified butter and turning once. Place on serving plates.

To fry the eggs:
Crack two eggs into two separate bowls to check that the yolks aren’t broken. In 2 6-inch non-stick skillets, melt half of the butter over medium-high heat, until it starts to bubble. Pour 1 egg into each pan, being careful not to break the yolks. Add a teaspoon of water to each pan, sprinkle the eggs with fleur de sel, and cover the pans with lids. Cook the eggs for about 3 minutes for a soft-cooked egg and 5-6 minutes if you like your eggs firm. Wipe out the skillets, and fry the other 2 eggs in the remaining butter in the same manner. Center a fried egg over each of the grilled sandwiches and sprinkle with pepper.

-----------------------------
Now when I saw Paula Deen make her Croque Madame Casserole, my mouth watered. I can do that! I have a leftover honey ham in the fridge and think it is destined to be sandwiched between layers of Gruyere cheese and béchamel white sauce.

Croque Madame Casserole by Paula Deen
6 tablespoons (1 stick) butter, plus 2 tablespoons for eggs
1/4 cup all-purpose flour
2 cups milk
2 tablespoons Dijon mustard
3/4 teaspoon salt, plus more for seasoning
1/2 teaspoon pepper, plus more for seasoning
1/2 teaspoon freshly grated nutmeg
10 to 12 slices white bread
3/4 pound deli ham
1 1/2 cups (6 ounces) grated Gruyere, reserve some for top of casserole
6 eggs

Directions
Preheat the oven to 400 degrees F. Grease an 8-inch square baking dish.
Melt 6 tablespoons of butter in a large skillet over low heat until bubbling. Whisk in the flour and cook for 1 minute. Slowly whisk in the milk and cook until thick and bubbling, 3 to 5 minutes more. Whisk in the mustard, salt, pepper, and nutmeg.

Pour a thin layer of the sauce into the prepared baking dish and cover it with 5 or 6 slices of the bread, then slices of the ham and an even layer of the Gruyere. Repeat the layers once more, ending with a third layer of sauce to cover all. Bake the casserole for 30 minutes. Remove it from the oven and cut into 6 equal pieces.

Working in 2 batches, melt 1tablespoon of butter in a large skillet over medium-high heat. Crack 3 eggs into the skillet and season with salt and pepper, to taste. Cook until the whites are nearly set, about 3 minutes. Carefully flip the eggs and continue cooking until the whites are completely set, about 1 minute more. You're going to top each portion of the casserole with a fried egg. Repeat with the remaining 3 eggs and 1 tablespoon butter. Top with Gruyere and it in the oven for a few minutes until cheese melts.

-----------------------------


I hated that we were out of eggs, so technically I'm striking out on my own and making a Croque Monsieur Casserole based on Paula Deen's recipe in conjunction with Ina Garten's Croque Monsieur recipe. The bechamel sauce is key in my opinion to her Croque Monsieur recipe as is the Gruyere cheese. The cheese is melted between two pieces of bread with ham, and then the sauce is poured over the top of the sandwich, sprinkled with more cheese and broiled until the cheese is bubbly and brown. Ina's recipe produces a wonderful french fork and knife sandwich and would be divine served for brunch.


My ingredient list:
1 C milk
1/2 C parmesan cheese, shredded
6 slices sourdough bread
8 ounces Gruyere, grated
2 T dijon mustard
3 slices honey baked ham
2 T butter
2 T flour
1 t salt
1/2 t pepper
pinch cayenne

Because I was cooking for Jim and I, six slices of sourdough was plenty. I used my small glass baking dish and these slender slices fit perfectly for three sandwiches. The ham slices are from a leftover Christmas dinner - I just LOVE repurposing leftovers.

We are going to make a béchamel sauce so I heated a cup of milk in the microwave until hot.

I'm going to add 1/2 c of greyer and 1/2 c of parmesan to the béchamel f sauce, so I went ahead and grated it before I began.  The sauce comes together quickly, so you want to have everything you need right in front of you before you begin.

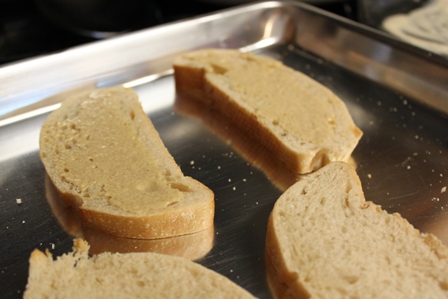
I put the six slices of sourdough on a baking pan and into a 400 degree oven for five minutes, then flipped and toasted for another three minutes.

Meanwhile, let's make the cheese sauce. Melt the butter in a small saucepan over low heat, then throw in the all purpose flour and stir to combine. Continue stirring until the flour begins to cook slightly.

Next, add the hot milk a little at a time, stirring after each addition to incorporate well.

Once the milk is all incorporated, begin adding the 1/2 c parm and the 1/2 c greyer. I found a whisk worked better for mixing during this step.

Next, I added a T of dijon mustard.

1 t salt and 1/2 t pepper.

For "kicks" I added a pinch of cayenne pepper.

To build the Monsieur, I put a little bit of my white sauce in the bottom of my baking dish.

After the sourdough was toasted, I slathered three slices with the remaining dijon mustard.

Start the bottom layer with the bread that has the mustard on it, top with a slice of ham.

Top with grated greyer cheese.

Top with the other slice of toast.

Slather with the white sauce.

Top with remaining greyer cheese.

Into the 400 degree oven for five minutes and then turn on the broiler for another 5 minutes, or until the topping is bubbly and lightly browned.
 
Serve hot with a fork and knife! Yummy French comfort food!

Saturday, January 1, 2011

Homemade Beef Jerky


During the holidays Jim and I spend a lot of time on the road between his family and mine. One of my favorite road trip foods has become beef jerky. It’s delicious for one, and it’s a low fat food packed with protein to help stave off trips through the tempting drive thru. One thing that kills me is the price of beef jerky! While traveling on 290 between Austin and Houston we stopped for gas and I went in the store to find some local jerky. There wasn’t a price on it, but I assumed it was around $5-6 which is what I usually pay for a small bag of peppered jerky. The clerk was ringing up our purchases and asked, “Do you know how much this is?” Jim and I replied, “no, how much?” and he answered, “It’s $14 and most people freak out when they see me ring it up. Do you still want it?” “uh, no!” we replied in unison.

I settled for Doritos and an ice tea at the time, but was determined to figure out why beef jerky has to be so expensive! Jim bought me a food dehydrator in November for my birthday and this seemed the perfect time to try my hand at homemade beef jerky.

You can make beef jerky from any kind of meat, even ground meat. After some research online I found that flank steak is the most preferred type of meat for jerky. If you are a hunter, this is prime time for venison meat. I’ve had venison jerky and it’s awesome too!

It was difficult to choose our first recipes to start with but I settled on three initial recipes for our jerky. After starting this project I have hundreds of ideas floating around my head, I can’t wait to keep experimenting. The options for marinades and flavors are limitless. Here is where Jim and I began...


Honey BBQ Flavor
1/3 cup honey
1/2 cup ketchup
1/4 cup butter
1 tablespoon apple cider vinegar
2 teaspoon Dijon mustard
2 tablespoon brown sugar
1 tablespoon soy sauce
1 mashed garlic clove
1 teaspoon chili powder

This marinade comes from The Food Addicts and actually has to simmer on the stove for about 5 minutes to let the butter melt and flavors incorporate, then pull off heat to cool slightly. Then you can add 1 lb or 1.5 lbs of meat strips to this mixture. This is Jim's favorite flavor because it's sweet and has a nice BBQ taste. Marinade overnight.


Peppered Jerky
This recipe makes enough peppery marinade for about 3 pounds of meat. To me, it is your standard jerky flavor and comes from Fabulous Foods. I found it wonderfully smokey and just a tad spicy. You can of course make this as spicy as you desire by adjusting the level of tabasco in the marinade.

2/3 cup Worcestershire sauce
2/3 cup soy sauce
1 teaspoon black pepper
1 teaspoon garlic powder
1 teaspoon onion powder
1 teaspoon liquid smoke
2-3 teaspoons Tabasco sauce

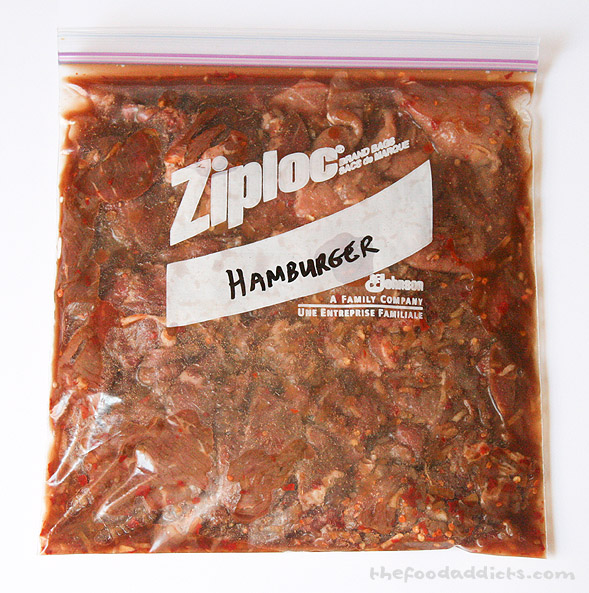
Add all the above ingredients to a zip top bag, add the meat strips and marinade overnight.


After I laid the strips in the food dehydrator I cracked black pepper on top of each one.


Mandy’s Spicy Jerky

1 teaspoon fish sauce
1 cup soy sauce
2 minced garlic cloves
1/4 cup water
1 teaspoon onion powder
1 teaspoon ground ginger
1 tablespoon Thai sauce
1 tablespoon chili garlic sauce


Because I march to the beat of my own drum I had to create my own flavor and so I took inspiration from the spicy Asian cooking I've been doing and came up with the above recipe for Spicy Jerky. Combine the above ingredients in a zip top bag with the beef strips and marinade overnight.

A few things I learned about making homemade beef jerky:
  • If you buy a beef round, partially freeze it before slicing. This will help you get thin strips.
  • Strips should be ¼ inch or thinner.
  • Slice the meat first before marinating.
  • Slice against the grain to make it easier to bite off and chew.
     
I purchased the flank steak that had already been tenderized, so it was almost thin enough.


I simply rolled it a little thinner.


Cut the meat into strips that fit your dehydrator so nothing overlaps.
  • Marinade the meat overnight at a minimum so the flavors really soak into the meat.
  • To aid in the drying process, use paper towels to absorb the excess marinade before placing in dehydrator.
Halfway through the drying process, blot the jerky with paper towels to absorb any oil that forms on the suffice. Ours didn’t have very much at all.

I also swapped the trays from top to bottom half way through the drying time just to make sure all the jerky was drying evenly.
  • Drying times are going to vary based on the moisture in the air, your altitude, the temperature you use. I would suggest checking every two hours. Ours took 5.5 hours to complete. You don’t want to dehydrate it so much that it becomes brittle like a cracker.
  • Store for up to two weeks in an air tight container or zip top bag. Putting it in the fridge may extend the life of your jerky for an extra week.


Making Beef Jerky in the Oven


You can also make jerky in the oven, there are lots of blogs that talk about how to do this. When ready for dehydration, place on a foil-lined sheet with no overlap. Cook in the oven at 175 for three hours and then turn over strips. Cook for another 2-3 hours. The timing all depends on the heat in your oven. It’s ready when it’s dry and has the texture of leather but not so dry that it’s brittle and snaps.


Now that I know how EASY and INEXPENSIVE it is to make your own beef jerky, those $14 bags can stick it. I will plan on making my own large batch of jerky from now on, and for less than $10.