
Risotto is such a wonderful and comforting meal. I learned how to make this Italian dish from the cookbook, Risotto, by Ursula Ferrigno.
I find this dish so versatile - perfect for a relaxed weekday meals or elegant dinner parties. Risotto is made with short-grain rice, which absorbs a large amount of liquid without the grains losing their bite. There are three main varieties: arborio, carnaroli, and vialone nano. Each one brings a slightly different texture to the dish. Arboria, perhaps the best-known, produces a dense risotto that can become too stiff if overcooked. Carnaroli is the most expensive, but its tender yet firm grain is ideal for risotto. It is also the least likely to overcook. Vialone nano is favored by Venetian cooks. (This is Ursula's preferred rice) It gives a creamy, voluptuous risotto.
Perfect risotto is easy to achieve. All you need is a good-quality risotto rice, homemade stock (preferred, but I usually use a low sodium fat free canned chicken stock), a wide shallow pan, and 18-20 minutes of constant stirring while the rice cooks. There are no short cuts, unfortunately, but SO WORTH IT!
Good risotto is made in stages. The key is to add hot, flavorful stock - a ladleful at a time - to the rice in the pan, stirring constantly until all the liquid has been absorbed and the rice is al dente. It should never be dry or sticky, but have a "wave-like" (all'onda) consistency. A risotto should stand for 2 minutes before serving, then be spooned into warmed bowls, not plates, and served with a fork, never a spoon. The moral of the story is that risotto is very yummy and surprisingly easy.
There are four steps.
- Lightly cook shallots (or onion and garlic) in oil and butter until softened.
- Add rice and stir until well coated and glistening.
- Add stock, a ladleful at a time, and simmer, stirring until absorbed before adding more. Repeat until all the liquid has been absorbed and the rice is tender but still firm.
- Mix in flavorings, such as vegetables, herbs, and cheese.
The picture above is a risotto I made full of good for you vegetables that I found in the fridge. I added chopped carrots in step one along with the onions because they are a dense veggie that needed to simmer and soften. I also added two big handfuls of edemame. I was actually munching on them while I cooked and decided to throw them into the risotto at the end. My favorite addition is the spinach. I used fresh baby spinach and stirred them in with the last ladle of chicken stock and it wilted perfectly in the hot risotto.

Here is a seafood risotto that I found on the
cooking light web site. Jim absolutely LOVED this recipe and told me it was in his top 10. (Hint, they are all in his top ten.)
With this recipe from cooking light, there is supposed to be two healthful portions but I found this made two HUGE portions and more realistically enough for four people. I completed the meal with a salad, asparagus and crisp white wine.

Ingredients
2 cups fat-free, less-sodium chicken broth
1 (8-ounce) bottle clam juice (I only used about 3/4 of the bottle)
2 teaspoons butter
1/4 cup chopped shallots
1/2 cup uncooked Arborio rice
1/8 teaspoon saffron threads, crushed (omitted)
1 tablespoon fresh lemon juice
1/2 cup grape tomatoes, halved
4 ounces medium shrimp, peeled and deveined
4 ounces bay scallops
2 tablespoons whipping cream (omitted)
Chopped fresh parsley (omitted)
Preparation
1. Bring broth and clam juice to a simmer in a medium saucepan (do not boil). Keep warm over low heat.
2. Melt butter in a large saucepan over medium heat. Add shallots to pan; cook 2 minutes or until tender, stirring frequently. Add rice to pan; cook 30 seconds, stirring constantly. Add lemon juice to pan; cook 15 seconds, stirring constantly. Stir in 1/2 cup hot broth mixture; cook 2 minutes or until the liquid is nearly absorbed, stirring constantly. Add remaining broth mixture, 1/2 cup at a time, stirring constantly until each portion of broth is absorbed before adding the next.

3. Stir in tomatoes; cook for 1 minute. Stir in shrimp; cook for 4 minutes or until shrimp is done, stirring occasionally. Remove from heat; stir in cream. Sprinkle with parsley, if desired.

I cooked the scallops separately. First I rinsed and dried these, sprinkled with salt, pepper and then dusted with whole wheat flour. (flour so they form a crust when I sear them.)

I heated just a little bit of olive oil over medium high heat, then put the scallops in - and let them sear. Don't move them around, just let them get a nice brown color on one side.

Then flip and let them sear on the other side until a nice brown crisp skin forms. Dont' walk away, this happens fast.

This was a fabulous meal! Top 10 in fact...


 Start with a can of Garbanzo Beans.
 And dump into your cuisinart blender.
 This is my secret ingredient. Lots of people put garlic in their hummus, but I roast my garlic in the oven for an hour until the garlic is brown, soft and bursting out.
 I started by squeezing a few cloves into the blender, but ended up using the entire head of garlic in this batch.
 Another secret ingredient, very special... truffle salt.
 A pinch each of crushed red pepper and black pepper (or to taste.) Add whatever ingredients you like or have on hand. Some types of hummus have a strong lemon flavor, some have an overwhelming garlic flavor, and some hummus has a spicy tone. When making your own hummus, you have to keep your own tastebuds in mind. If a recipe calls for a lot of tahini and you don't like tahini, scale down the amount or simply omit it. Pine nuts, roasted bell pepper, black bean, spinach, sun dried tomato, pumpkin or almond butter are all wonderful additions.
 When you have your ingredients chosen and put in the cuisinart, grab a good olive oil.
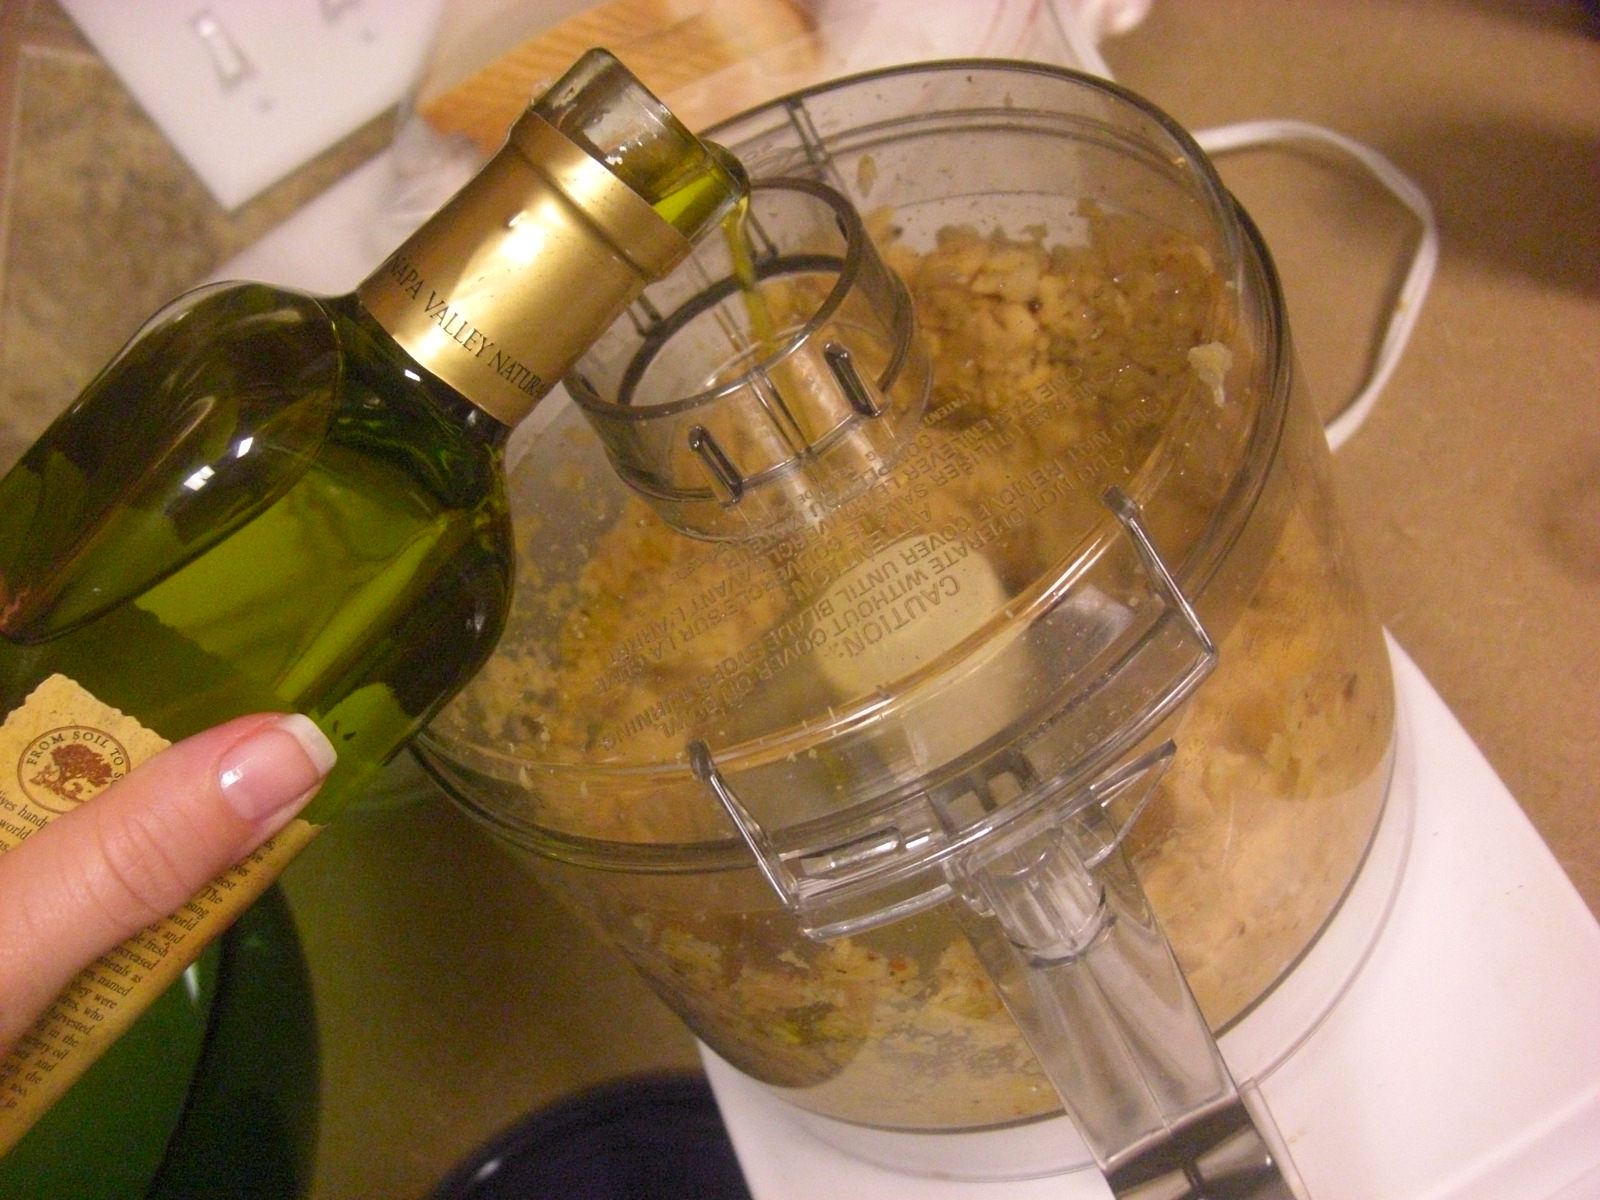 With the motor running, start to drizzle the olive oil until you reach the right consistency. It will probably be 1/2 cup per can of garbanzo beans.
 Because I like the flavor of sesame oil, I added about a tablespoon.
 Process until you reach your desired smoothness. Everyone is different, I like mine pretty smooth.
 For added flavor I chopped kalamata olives that had been marinated in herbs and cabernet.
 Spread the hummus on a plate and top with the olives and a sprinkling of freshly ground pepper. Serve with pita chips, crackers or crudite. This keeps for a while in the fridge, so make a batch early, then store until guest arrive for Thanksgiving - this gives them a healthy snack until dinner is ready.




 Talk about a photogenic food. I bought a couple ears of corn (why do they call them "ears?") at the grocery store and had never cooked them fresh before. I usually purchase the frozen half ears, and then steam them. Fresh corn on the cob is in season in the USA from May to September so I thought I would try my hand at this lovely vegetable.


